-
Notifications
You must be signed in to change notification settings - Fork 12
Expand file tree
/
Copy pathsetup.py
More file actions
215 lines (170 loc) · 20.3 KB
/
setup.py
File metadata and controls
215 lines (170 loc) · 20.3 KB
1
2
3
4
5
6
7
8
9
10
11
12
13
14
15
16
17
18
19
20
21
22
23
24
25
26
27
28
29
30
31
32
33
34
35
36
37
38
39
40
41
42
43
44
45
46
47
48
49
50
51
52
53
54
55
56
57
58
59
60
61
62
63
64
65
66
67
68
69
70
71
72
73
74
75
76
77
78
79
80
81
82
83
84
85
86
87
88
89
90
91
92
93
94
95
96
97
98
99
100
101
102
103
104
105
106
107
108
109
110
111
112
113
114
115
116
117
118
119
120
121
122
123
124
125
126
127
128
129
130
131
132
133
134
135
136
137
138
139
140
141
142
143
144
145
146
147
148
149
150
151
152
153
154
155
156
157
158
159
160
161
162
163
164
165
166
167
168
169
170
171
172
173
174
175
176
177
178
179
180
181
182
183
184
185
186
187
188
189
190
191
192
193
194
195
196
197
198
199
200
201
202
203
204
205
206
207
208
209
210
211
212
213
214
215
import setuptools
DESCRIPTION = r"""
<h1 align="center"><img src="https://raw.githubusercontent.com/mantasu/glasses-detector/main/docs/_static/img/logo-light.png" width=27px height=27px> Glasses Detector</h1>
<div align="center">
[](https://colab.research.google.com/github/mantasu/glasses-detector/blob/main/notebooks/demo.ipynb)
[](https://mantasu.github.io/glasses-detector/)
[](https://pypi.org/project/glasses-detector/)
[](https://docs.python.org/3/)
[](https://developer.nvidia.com/cuda-toolkit)
[](https://zenodo.org/badge/latestdoi/610509640)
[](https://opensource.org/licenses/MIT)
</div>
## About
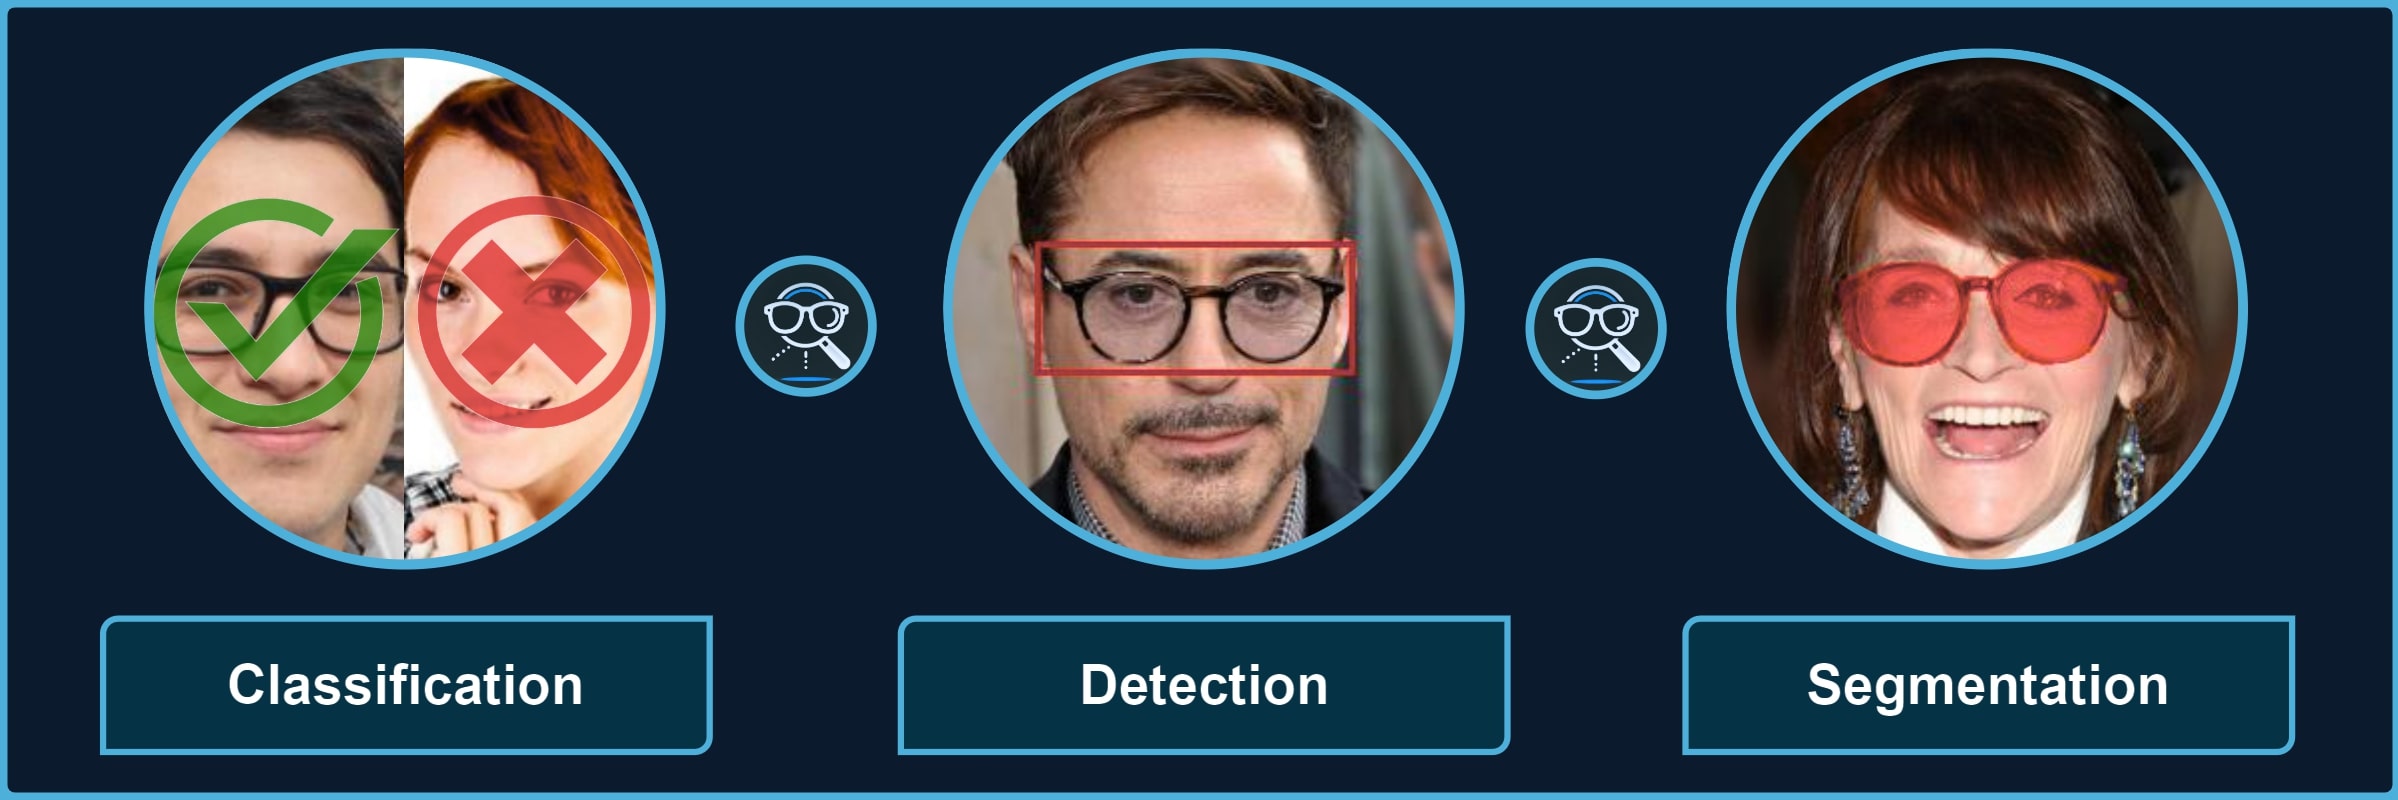
Package for processing images with different types of glasses and their parts. It provides a quick way to use the pre-trained models for **3** kinds of tasks, each divided into multiple categories, for instance, *classification of sunglasses* or *segmentation of glasses frames*.
<br>
<div align="center">
<table align="center"><tbody>
<tr><td><strong>Classification</string></td> <td> 👓 <em>transparent</em> 🕶️ <em>opaque</em> 🥽 <em>any</em> ➿<em>shadows</em></td></tr>
<tr><td><strong>Detection</string></td> <td> 🤓 <em>worn</em> 👓 <em>standalone</em> 👀 <em>eye-area</em></td></tr>
<tr><td><strong>Segmentation</string></td> <td> 😎 <em>full</em> 🖼️ <em>frames</em> 🦿 <em>legs</em> 🔍 <em>lenses</em> 👥 <em>shadows</em></td></tr>
</tbody></table>
$\color{gray}{\textit{Note: }\text{refer to}}$ [Glasses Detector Features](https://mantasu.github.io/glasses-detector/docs/features.html) $\color{gray}{\text{for visual examples.}}$
</div>
## Installation
> [!IMPORTANT]
> Minimum version of [Python 3.12](https://www.python.org/downloads/release/python-3120/) is **REQUIRED**. Also, you may want to install [Pytorch](https://pytorch.org/get-started/locally/) in advance to select specific configuration for your device and environment.
### Pip Package
If you only need the library with pre-trained models, just install the [pip package](https://pypi.org/project/glasses-detector/) and see **Quick Start** for usage (also check [Glasses Detector Installation](https://mantasu.github.io/glasses-detector/docs/features.html) for more details):
```bash
pip install glasses-detector
```
You can also install it from the source:
```bash
git clone https://github.com/mantasu/glasses-detector
cd glasses-detector && pip install .
```
### Local Project
If you want to train your own models on the given datasets (or on some other datasets), just clone the project and install training requirements, then see **[Running](https://github.com/mantasu/glasses-detector?tab=readme-ov-file#running)** section to see how to run training and testing.
```bash
git clone https://github.com/mantasu/glasses-detector
cd glasses-detector && pip install -r requirements.txt
```
You can create a virtual environment for your packages via [venv](https://docs.python.org/3/library/venv.html), however, if you have conda, then you can simply use it to create a new environment, for example:
```bash
conda create -n glasses-detector python=3.12
conda activate glasses-detector
```
> To set-up the datasets, refer to **[Data](https://github.com/mantasu/glasses-detector?tab=readme-ov-file#data)** section.
## Quick Start
### Command Line
You can run predictions via the command line. For example, classification of a single image and segmentation of images inside a directory can be performed by running:
```bash
glasses-detector -i path/to/img.jpg -t classification -d cuda -f int # Prints 1 or 0
glasses-detector -i path/to/img_dir -t segmentation -f mask -e .jpg # Generates masks
```
> [!TIP]
> You can also specify things like `--output-path`, `--size`, `--batch-size` etc. Check the [Glasses Detector CLI](https://mantasu.github.io/glasses-detector/docs/cli.html) and [Command Line Examples](https://mantasu.github.io/glasses-detector/docs/examples.html#command-line) for more details.
### Python Script
You can import the package and its models via the python script for more flexibility. Here is an example of how to classify people wearing sunglasses:
```python
from glasses_detector import GlassesClassifier
# Generates a CSV with each line "<img_name.jpg>,<True|False>"
classifier = GlassesClassifier(size="small", kind="sunglasses")
classifier.process_dir("path/to/dir", "path/to/preds.csv", format="bool")
```
And here is a more efficient way to process a dir for detection task (only single bbox per image is currently supported):
```python
from glasses_detector import GlassesDetector
# Generates dir_preds with bboxes as .txt for each img
detector = GlassesDetector(kind="eyes", device="cuda")
detector.process_dir("path/to/dir", ext=".txt", batch_size=64)
```
> [!TIP]
> Again, there are a lot more things that can be specified, for instance, `output_size` and `pbar`. It is also possible to directly output the results or save them in a variable. See [Glasses Detector API](https://mantasu.github.io/glasses-detector/docs/api.html) and [Python Script Examples](https://mantasu.github.io/glasses-detector/docs/examples.html#python-script) for more details.
### Demo
Feel free to play around with some [demo image files](https://github.com/mantasu/glasses-detector/demo/). For example, after installing through [pip](https://pypi.org/project/glasses-detector/), you can run:
```bash
git clone https://github.com/mantasu/glasses-detector && cd glasses-detector/data
glasses-detector -i demo -o demo_labels.csv --task classification:eyeglasses
```
You can also check out the [demo notebook](https://github.com/mantasu/glasses-detector/notebooks/demo.ipynb) which can be also accessed via [Google Colab](https://colab.research.google.com/github/mantasu/glasses-detector/blob/master/notebooks/demo.ipynb).
## Credits
For references and citation, please see [Glasses Detector Credits](https://mantasu.github.io/glasses-detector/docs/credits.html).
"""
setuptools.setup(
name="glasses-detector",
version="1.0.4",
author="Mantas Birškus",
author_email="mantix7@gmail.com",
license="MIT",
description="Glasses classification, detection, and segmentation.",
long_description=DESCRIPTION,
long_description_content_type="text/markdown",
url="https://github.com/mantasu/glasses-detector",
project_urls={
"Documentation": "https://mantasu.github.io/glasses-detector",
"Bug Tracker": "https://github.com/mantasu/glasses-detector/issues",
},
keywords=[
"python",
"pytorch",
"torchvision",
"computer",
"vision",
"image",
"face",
"eyes",
"transparent",
"opaque",
"glasses",
"googles",
"spectacles",
"eyeglasses",
"sunglasses",
"frames",
"lenses",
"legs",
"shadows",
"binary",
"identification",
"identifier",
"classification",
"classifier",
"segmentation",
"segmenter",
"detection",
"detector",
"cuda",
"mps",
"gpu",
],
install_requires=[
"tqdm",
"torch",
"torchvision",
],
classifiers=[
"Topic :: Scientific/Engineering :: Artificial Intelligence",
"Topic :: Scientific/Engineering :: Image Processing",
"Topic :: Scientific/Engineering :: Image Recognition",
"Topic :: Software Development :: Libraries :: Python Modules",
"Topic :: Software Development :: Libraries :: Application Frameworks",
"Development Status :: 5 - Production/Stable",
"Intended Audience :: Science/Research",
"Intended Audience :: Education",
"Intended Audience :: Developers",
"Intended Audience :: Information Technology",
"Programming Language :: Python",
"Programming Language :: Python :: 3",
"Programming Language :: Python :: 3.12",
"Programming Language :: Python :: 3.13",
"Natural Language :: English",
"License :: OSI Approved :: MIT License",
"Operating System :: OS Independent",
"Environment :: GPU :: NVIDIA CUDA :: 12",
"Environment :: Console",
"Environment :: MacOS X",
"Environment :: Win32 (MS Windows)",
"Environment :: Other Environment",
],
package_dir={"": "src"},
packages=setuptools.find_packages(where="src"),
entry_points={
"console_scripts": [
"glasses-detector=glasses_detector.__main__:main",
]
},
python_requires=">=3.12",
)