Game Prefab
To start using the framework with Unity3D, import the Unity package into your project. This will add all of the required .NET libraries, as well as empty blueprint and game configuration files. Next, in your game scene, add the Game prefab provided with the package. Let’s take a look at this prefab in detail.
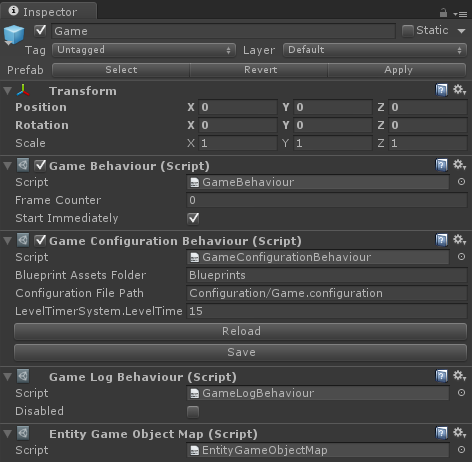
The first MonoBehaviour attached to the Game prefab is the GameBehaviour. This behavior is the main interface between Unity3D and your game logic. It holds a reference to one of your Game objects, and passes Unity Update calls to that game. Calling GameBehaviour.StartGame or ticking the Start Immediately checkbox will use your game configuration, your blueprints, and start the specified game.
The GameConfigurationBehaviour loads your blueprints and game configuration. This is done as soon as this behavior is enabled, for example when the scene is loaded. Note that this requires your files to reside in Resources folders. The GameBehaviour will pick up that data and pass it to your game.
You can even edit the game configuration in the Unity inspector. Add the InspectorType attribute to your system class, and other inspector attributes, such as InspectorInt or InspectorString to the properties you want to expose to the editor.
The GameLogBehaviour will automatically log all game events to Unity console. You might want to override the ToString methods of your event data objects in order to make this log output even more useful.