This course is based on this template: https://github.com/akkaraponph/nodejs-ts-fastify-mvc-starter-template
This course teaches you how to build an API using:
- Node.js
- Fastify (a web framework)
- Sequelize (for working with databases)
- MySQL (database)
MRCS means Model-Routes-Controllers-Services. This is a way to organize your code. It helps you keep your code clean and easy to understand.
Watch these videos first to install the tools you need:
In this episode, you will learn how to start your project and create your first API.
First, create a new Node.js project. Open your terminal and type:
npm init -yThis command creates a file called package.json. This file stores information about your project.
You can use npm or yarn. Both are package managers. They help you install libraries for your project.
If you want to use yarn, install it first:
npm install -g yarnHere are the yarn commands you need to know:
npm installis the same asyarn addnpm install -Dis the same asyarn add -Dnpm runis the same asyarn
You need to install TypeScript and some tools. TypeScript is a language that adds types to JavaScript.
Type this command in your terminal:
npm install --save-dev ts-node @types/node typescriptOr if you use yarn:
yarn add -D ts-node @types/node typescriptNow create a TypeScript configuration file. This file tells TypeScript how to work with your code.
Type this command:
npx tsc --initThis creates a file called tsconfig.json. Copy this code into that file:
{
  "compilerOptions": {
    /* Visit https://aka.ms/tsconfig to read more about this file */
    /* Language and Environment */
    "target": "ESNext",                                  /* Set the JavaScript language version for emitted JavaScript and include compatible library declarations. */

    /* Modules */
    "module": "commonjs",                                /* Specify what module code is generated. */
    // "rootDir": "./",                                  /* Specify the root folder within your source files. */
    "moduleResolution": "node",                       /* Specify how TypeScript looks up a file from a given module specifier. */
    "baseUrl": "./src",                                  /* Specify the base directory to resolve non-relative module names. */
    "outDir": "./dist",                                   /* Specify an output folder for all emitted files. */
    "esModuleInterop": true,                             /* Emit additional JavaScript to ease support for importing CommonJS modules. This enables 'allowSyntheticDefaultImports' for type compatibility. */
    "forceConsistentCasingInFileNames": true,            /* Ensure that casing is correct in imports. */

    /* Type Checking */
    "strict": true,                                      /* Enable all strict type-checking options. */
    "skipLibCheck": true                                 /* Skip type checking all .d.ts files. */
  },
  "include": [
    "**/*.ts"
, "src/config/db.config.ts"  ],
  "exclude": [
    "node_modules",
    "**/*.d.ts",
    "**/*.spec.ts"
  ]
}Fastify is a web framework. It helps you build APIs quickly.
Install it with this command:
npm install fastifyOr if you use yarn:
yarn add fastifyCreate a new file called index.ts in your project root folder.
Now you will write code to create your first API. Follow these steps:
import fastify from "fastify";This line imports the Fastify library.
Next, create your app:
const app = fastify()A route is a URL that your API can respond to. Create your first route:
app.get("/", async () => "SERVER");This creates a route at "/". When someone visits this URL, they will see "SERVER".
Now you need to start your server. Add this code:
    const PORT = 5000
    app.listen({port:Number(PORT)}, (err) => {
        if (err) {
            console.error(err)
            process.exit(1)
        }
        console.log(`SERVE ON ${PORT}`)
    })
This code starts your server on port 5000.
Save your file. Then open your terminal and type:
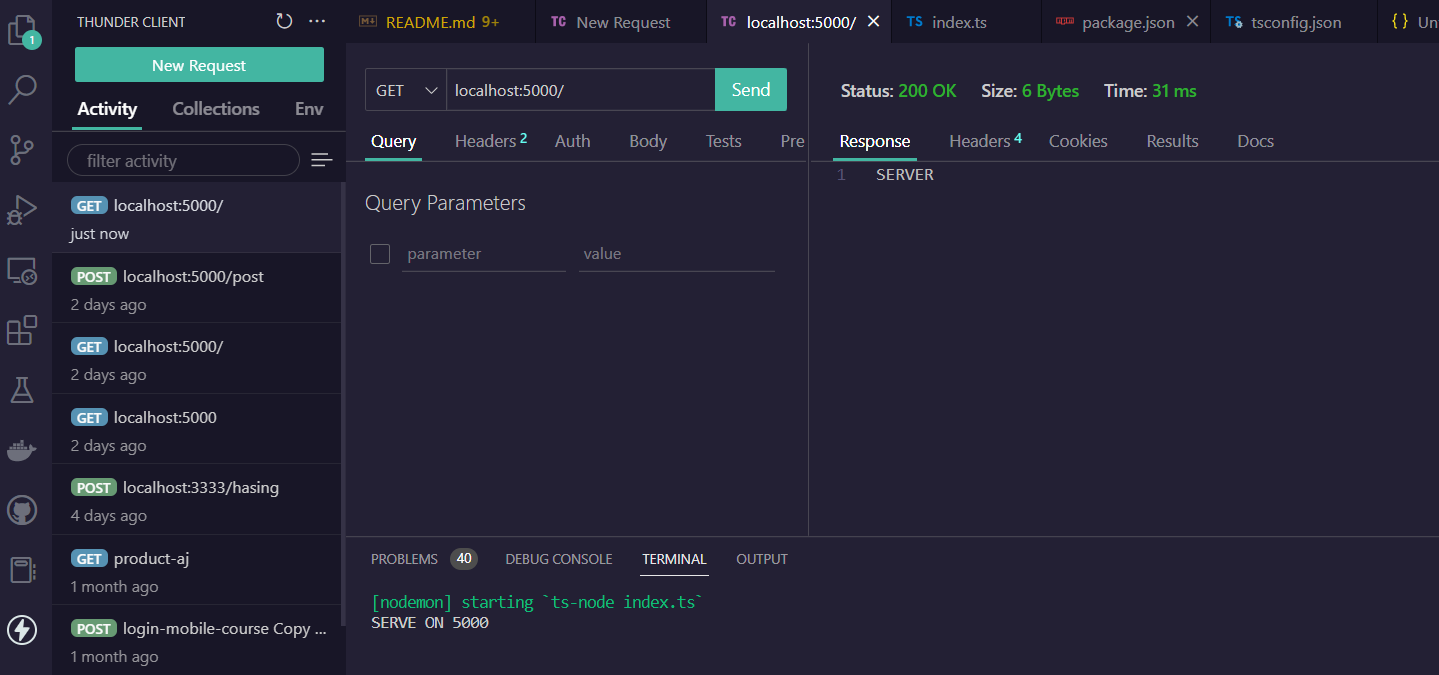
ts-node index.tsYou should see the message "SERVE ON 5000" in your terminal. This means your API is running!
The logs help you see what your API is doing. Let's make them look better.
Change your app code to this:
const app = fastify({
	logger: true
})
This turns on logging.
Replace the code from step 7.4 with this:
    const PORT = 5000
	app.listen({port:Number(PORT)}, (err) => {
		if (err) {
			app.log.error(err);
			process.exit(1)
		}
		app.log.info(`SERVE ON ${PORT}`)
	})
This uses the logger instead of console.log.
When you run your API now, you will see logs like this:
{"level":30,"time":1676779096246,"pid":25344,"hostname":"billo","msg":"Server listening at http://[::1]:5000"}
{"level":30,"time":1676779096248,"pid":25344,"hostname":"billo","msg":"Server listening at http://127.0.0.1:5000"}
{"level":30,"time":1676779096248,"pid":25344,"hostname":"billo","msg":"SERVE ON 5000"}You can test your API with Thunder Client. It is a tool for testing APIs. You can find it in the Visual Studio Code extensions.
You can also use other tools like Postman or Insomnia. These tools let you test different HTTP methods like GET, POST, PUT, PATCH, and DELETE. If your API uses GET method, you can also test it in your browser.
In this episode, you will learn how to test your API using Thunder Client.
Thunder Client is a tool for testing APIs. It works inside Visual Studio Code. You can use it to send requests to your API and see the responses.
Open Visual Studio Code. Go to the Extensions section. Search for "Thunder Client" and install it.
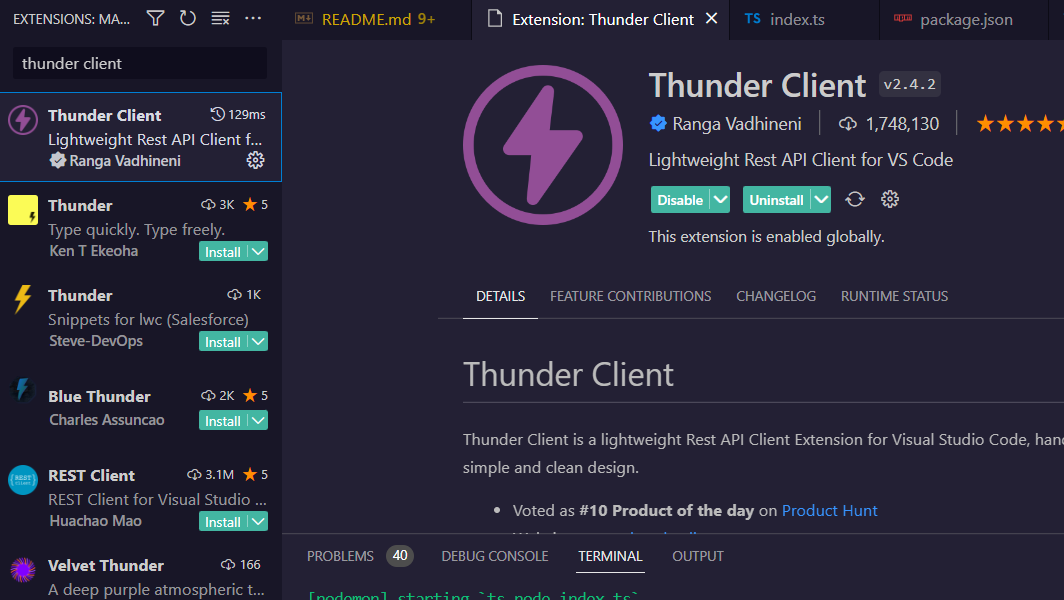
After installing Thunder Client, you will see a new icon in your sidebar. Click on it to open Thunder Client. You can create requests and test your API there.
After following all the steps in EP 01, your index.ts file should look like this:
import fastify from "fastify";

const app = fastify({
	logger: true
})

app.get("/", async () => "SERVER");

const PORT = 5000
app.listen({port:Number(PORT)}, (err) => {
	if (err) {
		app.log.error(err);
		process.exit(1)
	}
	app.log.info(`SERVE ON ${PORT}`)
})In this episode, you will learn how to organize your code better. We will move the app logic to a separate file.
When your code grows, it is better to organize it. This makes your code easier to read and maintain. We will create a src folder and put our code there.
First, create a new folder called src in your project root.
Create a new file called app.ts inside the src folder. Move the app creation code there.
import fastify, { FastifyServerOptions } from "fastify";

const App = (options: FastifyServerOptions) => {
	const app = fastify(options)

	app.get("/", async () => "SERVER");
	return app
}
export default App
This code creates a function called App. This function takes options and creates a Fastify app. It returns the app so you can use it later.
Now update your index.ts file. Import the App function and use it to create your app:
import App from "./src/app";

const app = App({
	logger: true
})
const PORT = 5000
app.listen({port:Number(PORT)}, (err) => {
	if (err) {
		app.log.error(err);
		process.exit(1)
	}
	app.log.info(`SERVE ON ${PORT}`)
})- Before: All your code was in
index.ts - After: The app logic is in
src/app.ts, andindex.tsonly starts the server
This makes your code more organized. When you add more features, you will add them to the src folder.
In this episode, you will learn how to create routes. Routes are URLs that your API responds to.
A route is a URL path. When someone visits that URL, your API responds. For example, /api/v1/articles is a route.
Create a new folder called routes inside the src folder.
Create a new file called article.route.ts inside the src/routes folder.
import { FastifyInstance } from "fastify";

const articleRouter = async (app: FastifyInstance) => {
	// This is sample data for testing
	const article = {
		id: "1",
		name: "node.js fastify",
		desc: "Fast and easy course for building APIs"
	}

	// Create a GET route at "/"
	app.get(
		"/",
		() => {
			return {
				articles: [
					article
				]
			}
		}
	);
};

export default articleRouter;
This code creates a router for articles. It has one route that returns sample data.
Create a new file called index.ts inside the src/routes folder. This file exports all your routes.
import articleRouter from "./article.route";

export { articleRouter };Now you need to tell your app to use this route. Update your src/app.ts file.
import fastify, { FastifyServerOptions } from "fastify";
import { articleRouter } from "./routes";

const App = (options: FastifyServerOptions) => {
	const app = fastify(options)

	app.get("/", async () => "SERVER");
	// Register the article router with a prefix
	app.register(articleRouter, { prefix: "/api/v1/articles" });
	return app
}
export default App
The prefix means all article routes will start with /api/v1/articles.
- Stop your server by pressing
CTRL + Cin your terminal - Start it again with:
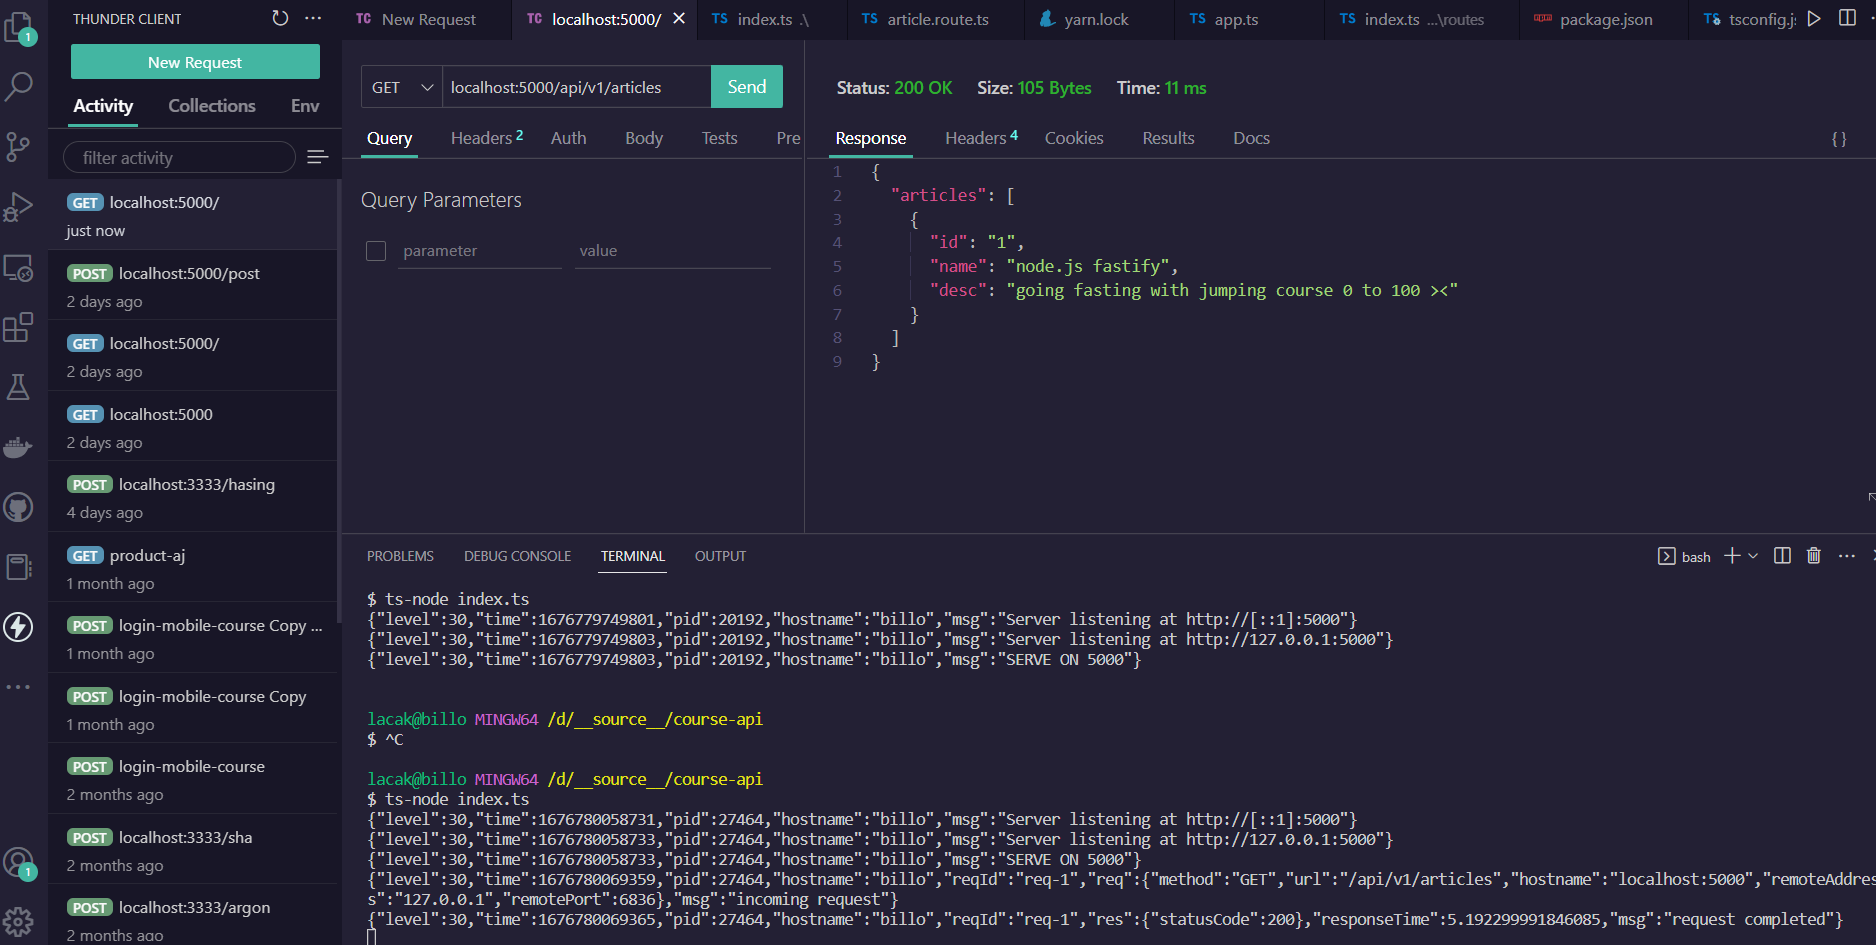
ts-node index.ts - Open Thunder Client and test the route:
http://localhost:5000/api/v1/articles
You should see the article data when you visit the route:
In this episode, you will learn about controllers. Controllers handle the logic for your routes.
A controller is a function that handles requests. When someone visits a route, the controller decides what to do and what to return.
Create a new folder called controllers inside the src folder.
Create a new file called article.controller.ts inside the src/controllers folder.
export const handleGetArticle = () => {
	// This is sample data for testing
	const article = {
		id: "1",
		name: "node.js fastify",
		desc: "Fast and easy course for building APIs"
	}
	return {
		articles: [
			article
		]
	}
}

export default {
	handleGetArticle
}
This controller function returns article data. Later, it will get data from a service.
Create a new file called index.ts inside the src/controllers folder.
import articlesController from "./article.controller";
export { articlesController };Now update your src/routes/article.route.ts file to use the controller.
import { FastifyInstance } from "fastify";
import articleController from './../controllers/article.controller';

const articleRouter = async (app: FastifyInstance) => {
	// Use the controller function as the handler
	app.get(
		"/",
		articleController.handleGetArticle
	);
};

export default articleRouter;
Now your route uses the controller. This separates the route logic from the business logic.
In this episode, you will learn about services. Services contain the business logic of your application.
A service is where you put your business logic. It handles things like getting data or processing information. Controllers call services.
Create a new folder called services inside the src folder.
Create a new file called article.service.ts inside the src/services folder.
export const getArticles = () => {
	const data = {
		id: "1",
		name: "node.js fastify",
		desc: "Fast and easy course for building APIs"
	}

	return { response: data }
}

export default {
	getArticles
}
This service function returns article data. Later, it will get data from a database.
Create a new file called index.ts inside the src/services folder.
import articleService from "./article.service";
export { articleService };Now update your src/controllers/article.controller.ts file to use the service.
import { articleService } from "../services";

export const handleGetArticle = () => {
	return articleService.getArticles()
}

export default {
	handleGetArticle
}
Now your controller calls the service. This separates the request handling from the business logic.
In this episode, you will learn how to set up MySQL database using Laragon.
MySQL is a database. It stores your data in tables. You will use it to store articles and other information.
Laragon is a tool that helps you run MySQL on your computer. It makes it easy to start and manage MySQL.
First, install Laragon. Follow this video: How to Install Laragon
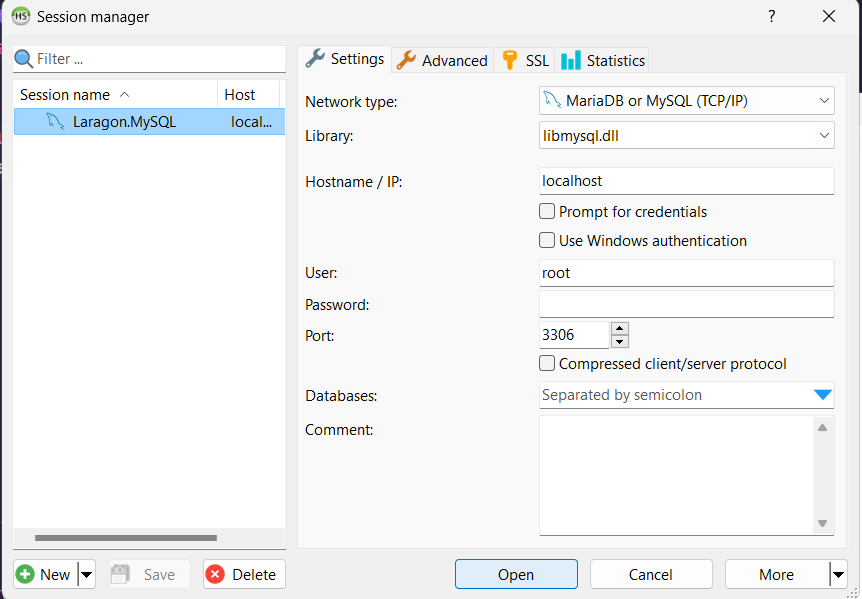
Open Laragon and click the "Start All" button to start the MySQL server.
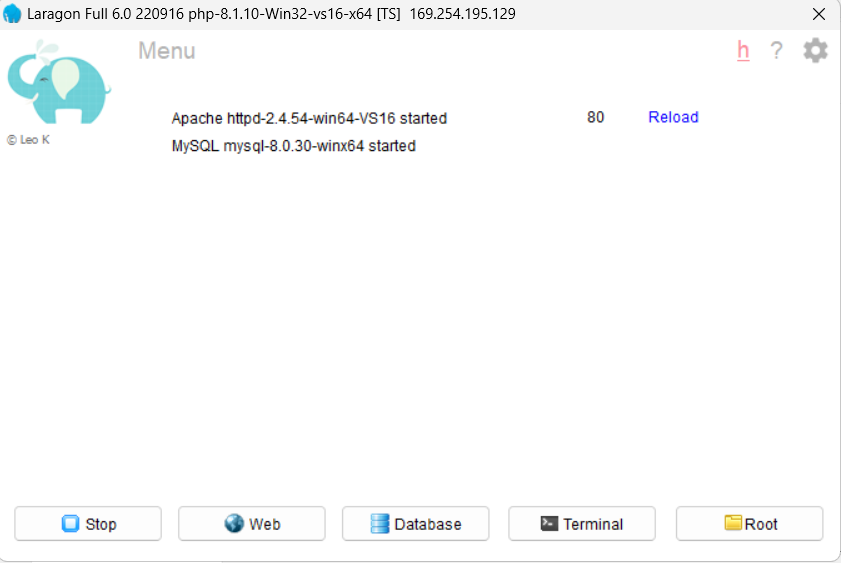
Click on the "Database" button in Laragon to open the database manager.
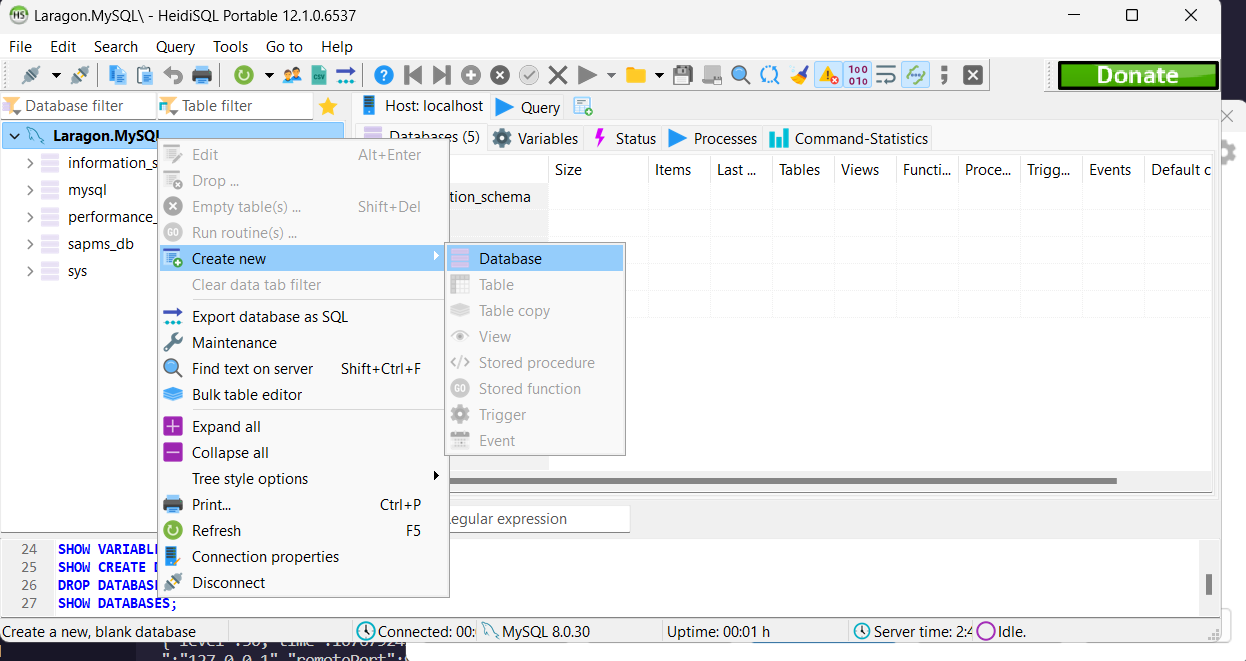
- Click on "Database" in the left sidebar
- Right-click and select "Create Database"
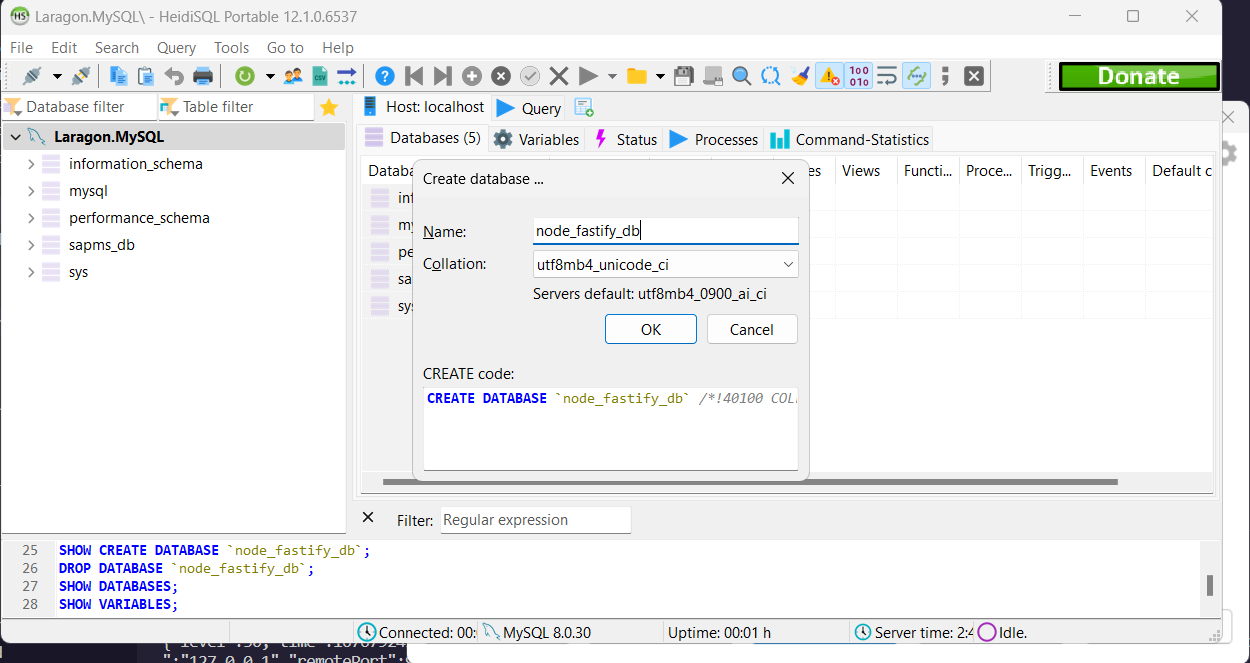
Name your database node_fastify_db and click "OK".
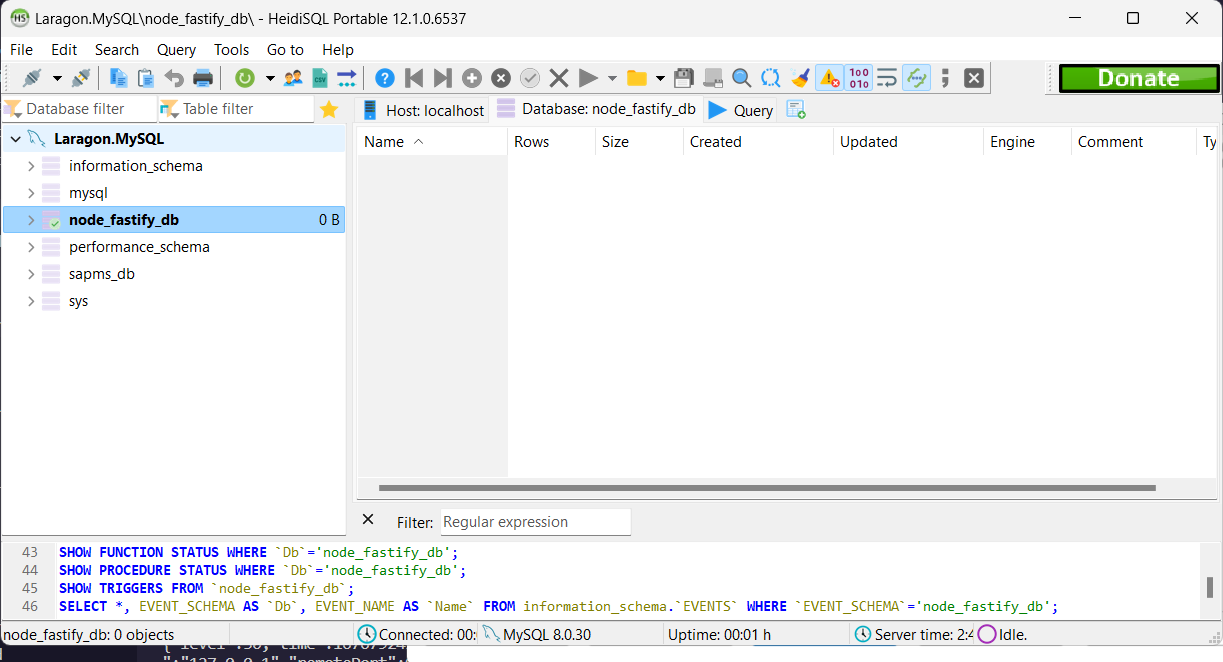
Great! Your database is ready. In the next episode, you will learn how to connect your API to this database.
In this episode, you will learn how to connect your API to the database using Sequelize.
Sequelize is an ORM (Object-Relational Mapping). It helps you talk to your database. You use models to work with database tables.
Dotenv is a package that helps you use environment variables. Environment variables store secret information like database passwords. You put them in a .env file.
mysql2 is a driver for MySQL. It allows your code to connect to MySQL database. If you use PostgreSQL, you would use pg instead.
Install Sequelize, dotenv, and mysql2:
npm install sequelize dotenv mysql2Or if you use yarn:
yarn add sequelize dotenv mysql2Create a new file called .env in your project root. This file stores your database settings.
Important: The default MySQL username in Laragon is root and the password is empty "".
We separate the settings for different environments: development, production, and test.
NODE_ENV=development

DB_USERNAME_DEV=root
DB_PASSWORD_DEV=""
DB_DATABASE_DEV=node_fastify_db
DB_HOST_DEV=localhost

DB_USERNAME_PROD=root
DB_PASSWORD_PROD=""
DB_DATABASE_PROD=node_fastify_db_production
DB_HOST_PROD=localhost

DB_USERNAME_TEST=root
DB_PASSWORD_TEST=""
DB_DATABASE_TEST=node_fastify_db_test
DB_HOST_TEST=localhost

DB_DIALECT=mysql
We need to create config files to use the .env file. First, we import dotenv. Then we create a config that reads values from the .env file.
Create a new folder called config inside the src folder. Then create a file called config.ts inside src/config.
import dotenv from "dotenv";
dotenv.config();

const config = {
  env: process.env.NODE_ENV || "development",
  port: process.env.PORT || 5000,
  database: {
    dev: {
      username: process.env.DB_USERNAME_DEV,
      password: process.env.DB_PASSWORD_DEV,
      name: process.env.DB_DATABASE_DEV,
      host: process.env.DB_HOST_DEV,
    },
    production:{
      username: process.env.DB_USERNAME_PROD,
      password: process.env.DB_PASSWORD_PROD,
      name: process.env.DB_DATABASE_PROD,
      host: process.env.DB_HOST_PROD,
    },
    test: {
      username: process.env.DB_USERNAME_TEST,
      password: process.env.DB_PASSWORD_TEST,
      name: process.env.DB_DATABASE_TEST,
      host: process.env.DB_HOST_TEST,
    },
    dialect: process.env.DB_DIALECT,
  },
};

export default config;Create a new file called db.config.ts inside the src/config folder.
import config from "./config"; // this is important!

module.exports = {
  development: {
    username: config.database.dev.username,
    password: config.database.dev.password,
    database: config.database.dev.name,
    host: config.database.dev.host,
    dialect: config.database.dialect,
  },
  test: {
    username: config.database.test.username,
    password: config.database.test.password,
    database: config.database.test.name,
    host: config.database.test.host,
    dialect: config.database.dialect,
  },
  production: {
    username: config.database.production.username,
    password: config.database.production.password,
    database: config.database.production.name,
    host: config.database.production.host,
    dialect: config.database.dialect,
  },
};Models represent your database tables. They define what data you can store.
Create a new folder called types inside the src folder.
Create a new folder called articles inside the src/types folder. Then create a file called article.model.types.ts inside src/types/articles.
export interface ArticleAttributes {
  id?: string;
  title?: string;
  text?: string;
  type?: string;
  UserId?: string;
  createdAt?: Date;
  updatedAt?: Date;
}Create a new folder called models inside the src folder.
Create a new file called index.ts inside the src/models folder.
Note: The code below is usually generated by sequelize-cli. But for TypeScript, we modified it to read config from ../config/db.config.ts.
"use strict";

const fs = require("fs");
const path = require("path");
const basename = path.basename(__filename);
const Sequelize = require("sequelize");
const env = process.env.NODE_ENV || "development";
const config = require(__dirname + "/../config/db.config.ts")[env];
const db: any = {};

let sequelize: any;
if (config.use_env_variable) {
  sequelize = new Sequelize(process.env[config.use_env_variable], config);
} else {
  sequelize = new Sequelize(
    config.database,
    config.username,
    config.password,
    config
  );
}

fs.readdirSync(__dirname)
  .filter((file: string) => {
    return (
      file.indexOf(".") !== 0 && file !== basename && file.slice(-3) === ".ts"
    );
  })
  .forEach((file: any) => {
    const model = require(path.join(__dirname, file))(
      sequelize,
      Sequelize.DataTypes
    );
    db[model.name] = model;
  });

Object.keys(db).forEach((modelName) => {
  if (db[modelName].associate) {
    db[modelName].associate(db);
  }
});

db.sequelize = sequelize;
db.Sequelize = Sequelize;

export default db;Create a new file called article.model.ts inside the src/models folder.
This file defines the Article model. The models/index.ts file will automatically read this file and create the model based on what you declare.
"use strict";
import * as Sequelize from "sequelize";
import { Model, UUIDV4 } from "sequelize";
import { ArticleAttributes } from "types/articles/article.model.types";

module.exports = (sequelize: any, DataTypes: any) => {
  class Article
    extends Model<ArticleAttributes>
    implements ArticleAttributes
  {
    /**
     * Helper method for defining associations.
     * This method is not a part of Sequelize lifecycle.
     * The `models/index` file will call this method automatically.
     */
    id!: string;
    title!: string;
    text!: string;
    type!: string;
    static associate(models: any) {
      // define association here

    }
  }
  Article.init(
    {
      id: {
        type: DataTypes.UUID,
        defaultValue: UUIDV4,
        allowNull: false,
        primaryKey: true,
      },
      title: {
        type: DataTypes.STRING,
        allowNull: false,
      },
      text: {
        type: DataTypes.STRING(500),
      },
    },
    {
      sequelize,
      modelName: "Article",
    }
  );
  return Article;
};Now update your index.ts file to:
- Import the database and config files
- Get the PORT from the config file
- Sync the database with Sequelize (this creates the tables)
import App from "./src/app";
import db from "./src/models"
import config from "./src/config/config"

const app = App({
	logger: true
})
const PORT: string | number = config.port

db.sequelize.sync().then(() => {
app.listen({port:Number(PORT)}, (err) => {
	if (err) {
		app.log.error(err);
		process.exit(1)
	}
	app.log.info(`SERVE ON ${PORT}`)
})
})Nodemon automatically restarts your app when you change the code. This is very helpful during development.
Important: Only use nodemon in development. It will restart your app every time you save a file.
npm install -D nodemonOr if you use yarn:
yarn add -D nodemonOpen your package.json file. Find the "scripts" section and add this line:
"dev": "nodemon index.ts"Now you can run your app with:
npm run devOr if you use yarn:
yarn devYour app will automatically restart when you change your code!
This is a bonus section. You will learn how to create a complete CRUD API. CRUD means Create, Read, Update, and Delete.
Note: This section does not have a video tutorial. Follow the steps below to build a complete Articles API.
You will create an Articles API with these operations:
- GET - Get all articles
- GET - Get one article by ID
- POST - Create a new article
- PUT - Update an article
- DELETE - Delete an article
The flow is: routes → controllers → services → models (Sequelize) → MySQL database
We will create 5 routes in the article router. Each route calls a controller function.
import { FastifyInstance } from "fastify";
import articleController from './../controllers/article.controller';

const articleRouter = async (app: FastifyInstance) => {
	// GET all articles
	app.get(
		"/",
		articleController.handleGetArticle
	);

	// GET one article by ID
	app.get(
		"/get/:id",
		articleController.handleGetArticleById
	);

	// POST create a new article
	app.post(
		"/create",
		articleController.handleCreateArticle
	);

	// PUT update an article
	app.put(
		"/update/:id",
		articleController.handleUpdateArticle
	);

	// DELETE delete an article
	app.delete(
		"/delete/:id",
		articleController.handleDeleteArticle
	);
};

export default articleRouter;We need to define types for the request data. This helps TypeScript understand what data to expect.
Create a new file called article.controller.types.ts inside src/types/articles.
import { FastifyRequest } from "fastify";
export type RequestWithIdArticle = FastifyRequest<{
	Params: { id: string };
}>;


export type UpdateArticleRequest = FastifyRequest<{
	Params: { id: string };
	Body: {
		title?: string | undefined;
		text?: string | undefined;
		type?: string | undefined;
	};
}>;

export type ArticleCreateRequest = FastifyRequest<{
	Body: {
		title?: string | undefined;
		text?: string | undefined;
		type?: string | undefined;
	};
}>;In the article controller, we will create handler functions. Each function calls a service function.
import { ArticleCreateRequest, RequestWithIdArticle, UpdateArticleRequest } from "types/articles/article.controller.types";
import { ArticleAttributes } from "types/articles/article.model.types";
import { articleService } from "../services";


export const handleGetArticle = async () => {
	return articleService.getArticles()
}

export const handleGetArticleById = async (req: RequestWithIdArticle) => {
	const id = req.params.id;
	return articleService.getOneArticle(id)
}

export const handleCreateArticle = async (req: ArticleCreateRequest) => {
	const { title, text, type } = req.body
	return articleService.createArticle({ title, text, type })
}

export const handleUpdateArticle = async (req: UpdateArticleRequest) => {
	const { title, text, type } = req.body
	return articleService.updateArticle(req.params.id, { title, text, type })
}

export const handleDeleteArticle = async (req: RequestWithIdArticle) => {
	return articleService.deleteArticle(req.params.id)
}

export default {
	handleGetArticle,
	handleGetArticleById,
	handleCreateArticle,
	handleUpdateArticle,
	handleDeleteArticle
}In the article service, we create functions that use Sequelize to interact with the database.
import { ArticleAttributes } from "types/articles/article.model.types";
import db from "../models";
const ArticleModel = db.Article

export const getArticles = async (): Promise<ArticleAttributes[]> => {
	const response = await ArticleModel.findAll();
	return response
}

export const getOneArticle = async (id: string): Promise<ArticleAttributes> => {
	const response: ArticleAttributes = await ArticleModel.findByPk(id)
	return response
}

export const createArticle = async (body: ArticleAttributes): Promise<ArticleAttributes> => {
	const response: ArticleAttributes = await ArticleModel.create(body)
	return response
}

export const updateArticle = async (id: string, body: ArticleAttributes) => {
	const response = await ArticleModel.update({ ...body }, { where: { id } })
	return response
}

export const deleteArticle = async (id: string) => {
	const response = await ArticleModel.destroy({ where: { id } });
	return response
}

export default {
	getArticles,
	getOneArticle,
	createArticle,
	updateArticle,
	deleteArticle
}Now you can test all the routes using Thunder Client. Here are examples of the results:
Visit GET http://localhost:5000/api/v1/articles to get all articles:

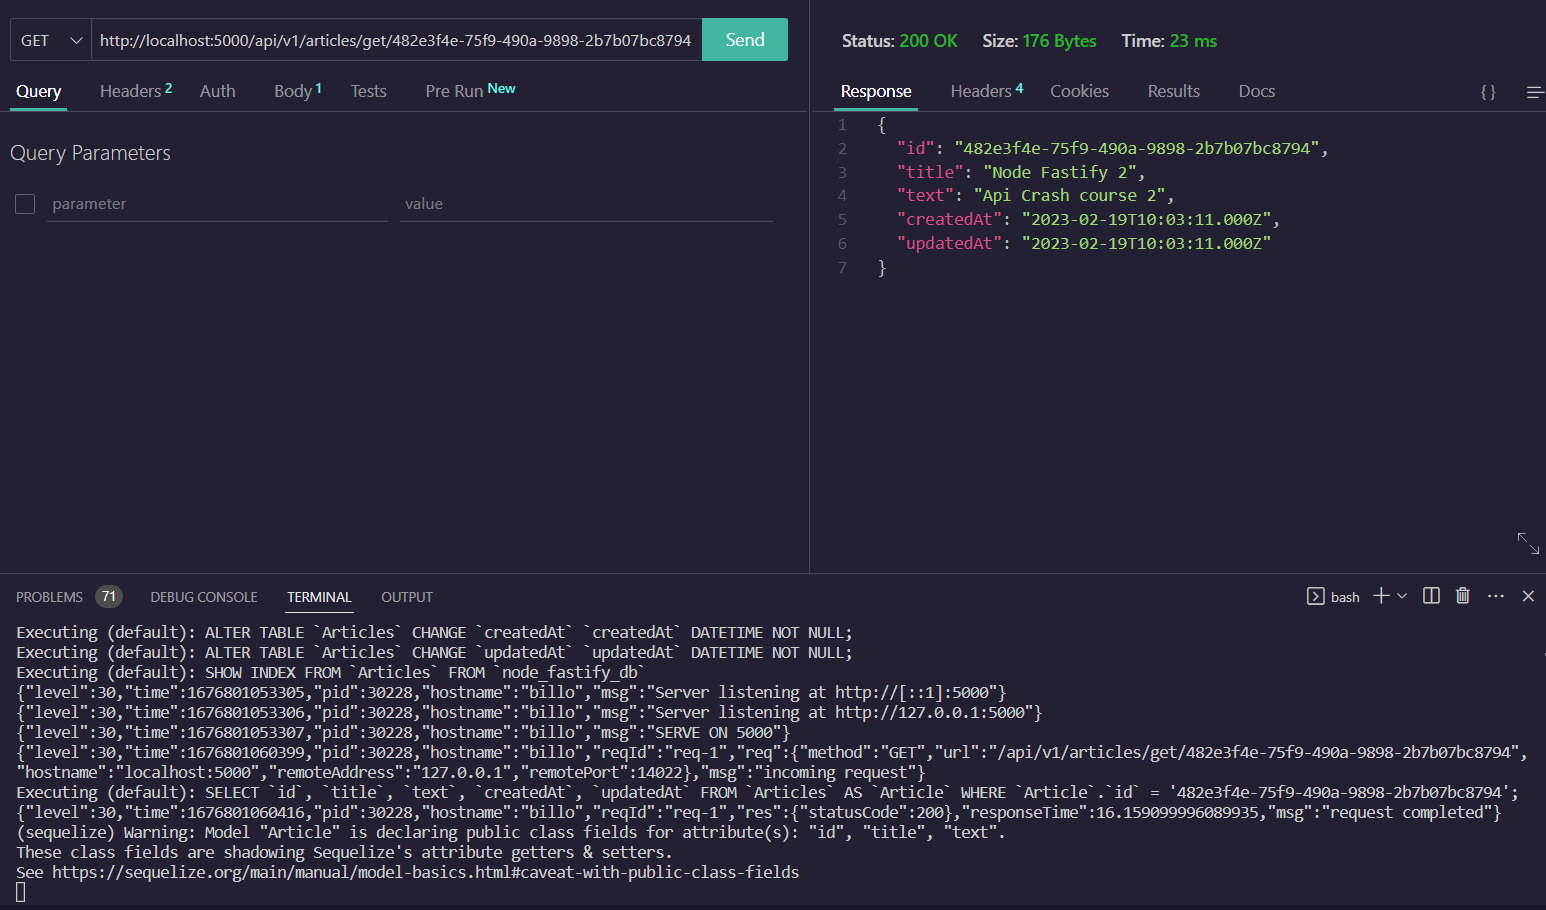
Visit GET http://localhost:5000/api/v1/articles/get/:id to get one article (replace :id with an article ID):
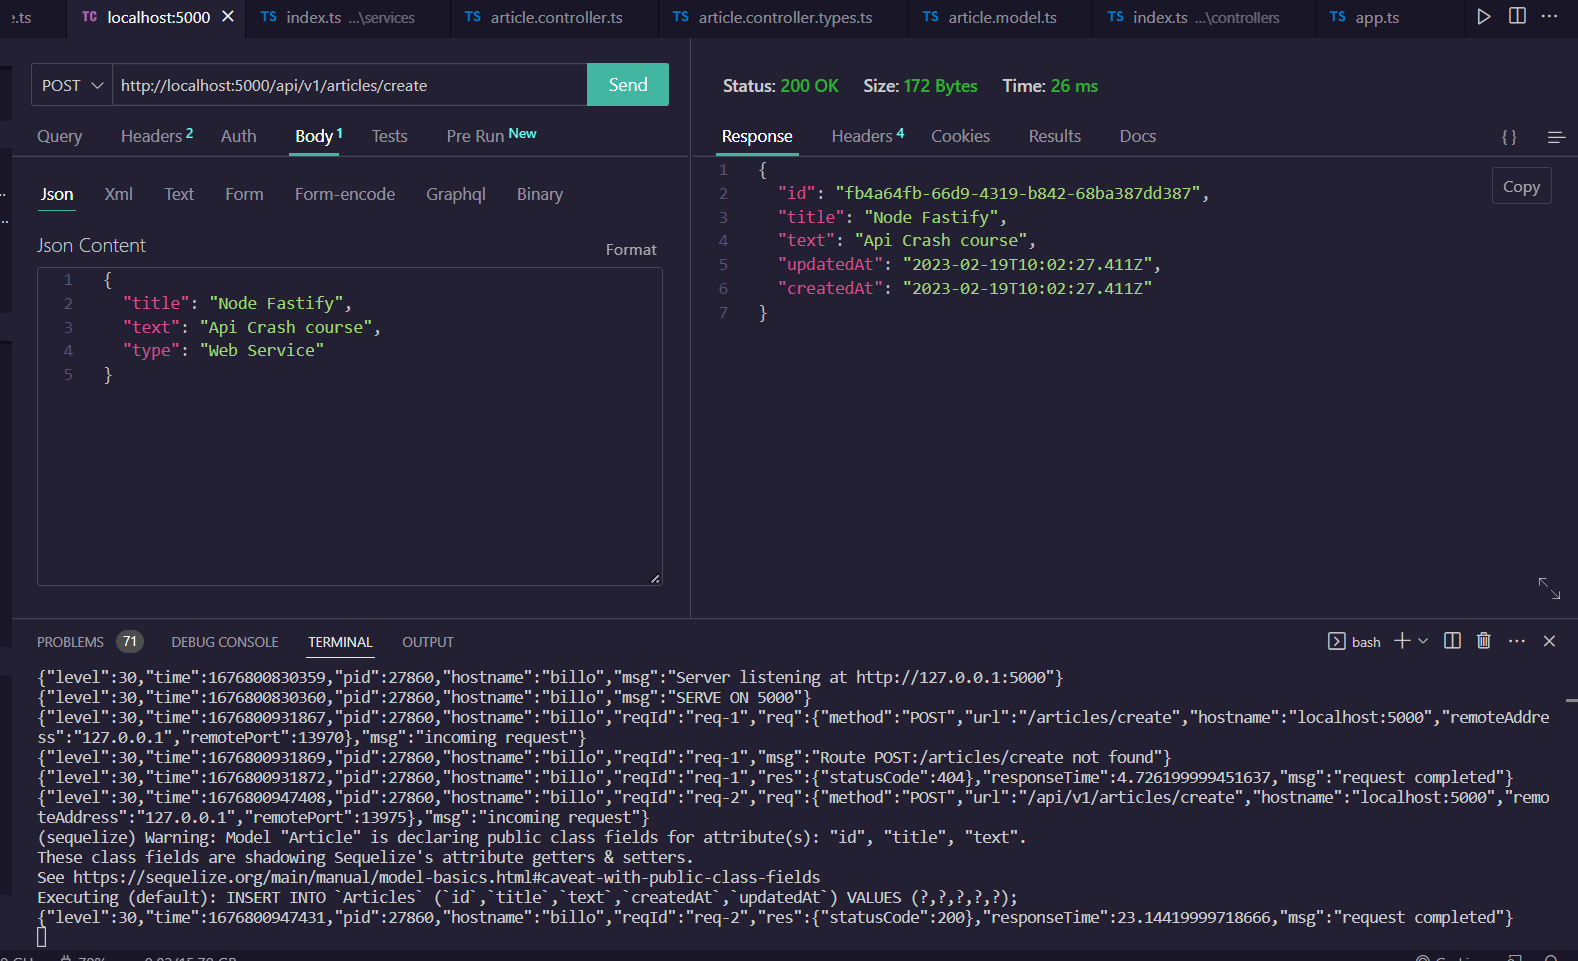
Send a POST request to http://localhost:5000/api/v1/articles/create with article data in the body:
Send a PUT request to http://localhost:5000/api/v1/articles/update/:id with updated data in the body:

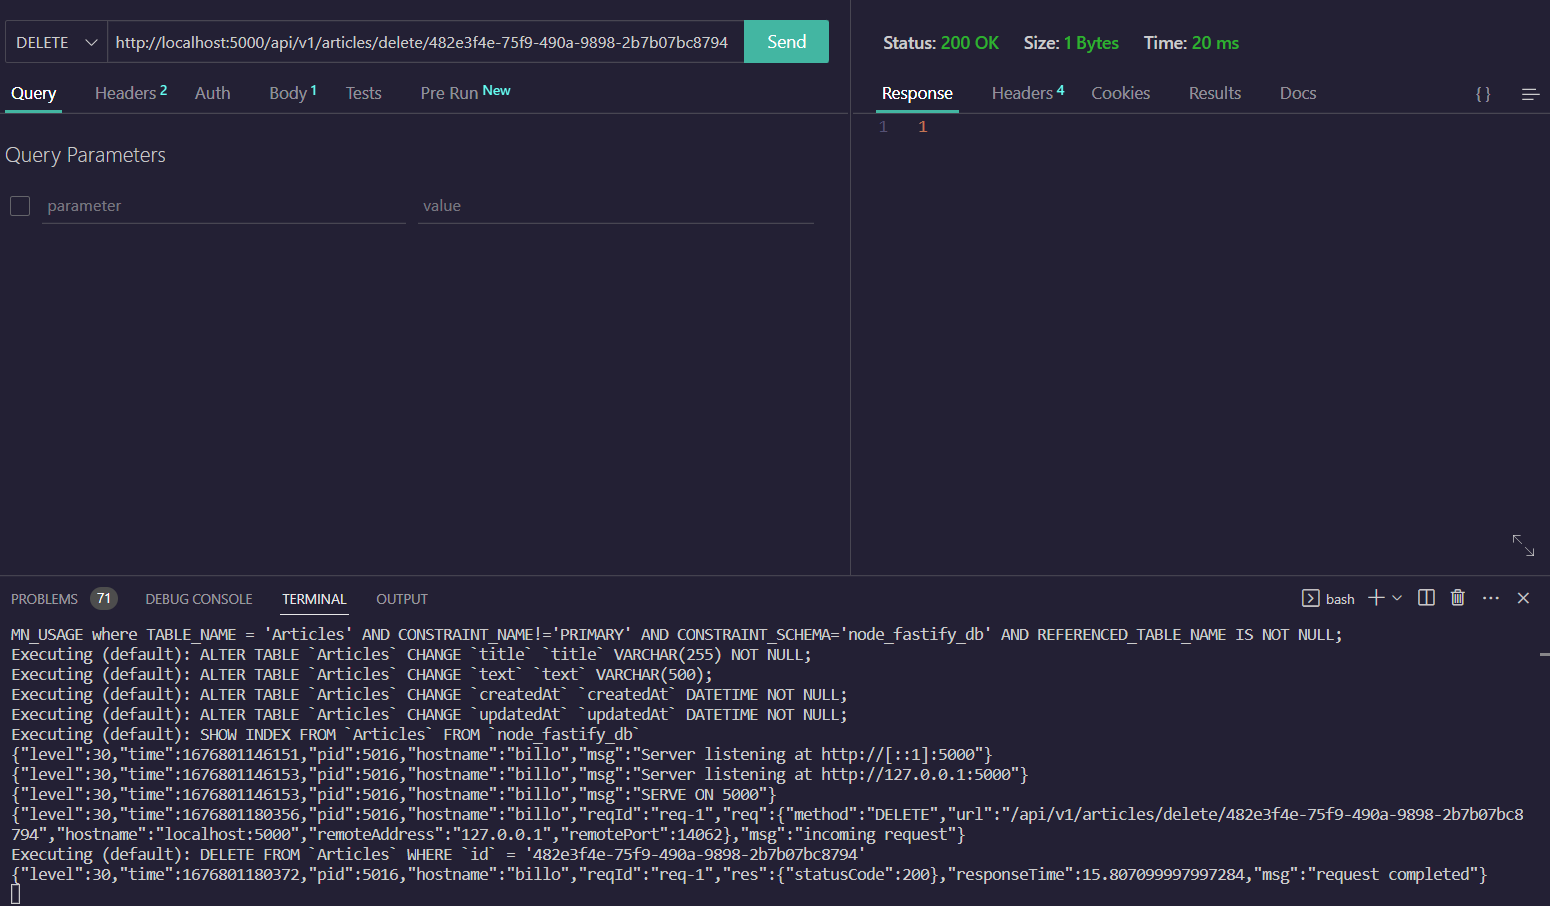
Send a DELETE request to http://localhost:5000/api/v1/articles/delete/:id to delete an article:
Congratulations! You now have a complete CRUD API working with a database!